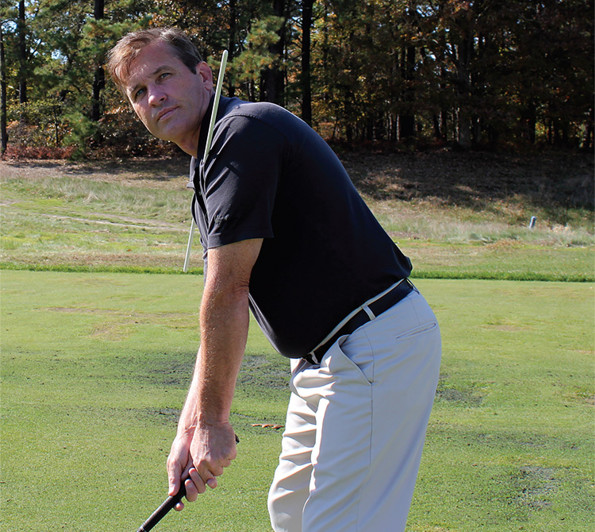
After over 30 years of teaching golf, I’ve concluded that most golfers simply do not know how to aim. If you ask them where they should be aimed, they will most likely be able to tell you information relating to having the clubface, stance and shoulders “square,” but they don’t realize how off-line they are. The problem, as I see it, is they have no defined process for aiming. The key to excellent alignment is an organized pre-shot routine.
|
| Master your 'Aiming' and hit the ball where you want it to go! |
THE 3 MAIN MISTAKES IN AIMING
After learning the ABCs of Aiming with The Two-Minute Drill, you will Master aiming and begin hitting the ball where you want it to go.
 |
A typical golfer’s aim goes wrong in these three areas:
Clubface — Open or Closed.
Body — 1. Shoulders Open, 2. Stance Closed or 3. Combination of Shoulders Open and Stance Closed.
As a result, shots can go anywhere, but not often down the middle.
 |
THE ALIGNMENT SHIRT SYSTEM
To work most effectively on The ABCs of Aiming with Two-Minute Drill, I have come up with The Alignment Shirt System. Take the time to use this system and you will not only consistently have clubface and stance lined up square, you will nail your shoulder alignment. Shoulders are traditionally the most difficult to aim — many of us need someone else’s eyes to help get them square.
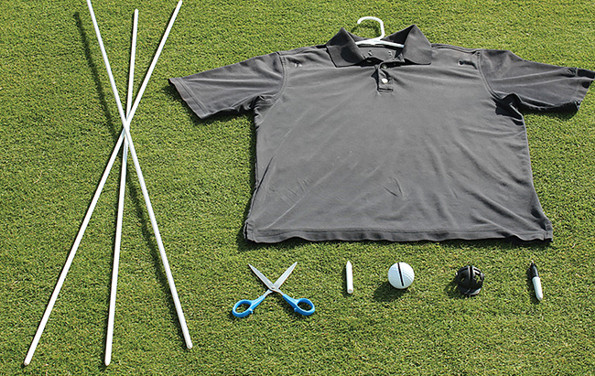 |
WHAT YOU NEED
+ Shirt
+ Chalk
+ Scissors
+ 3 - Alignment rods
+ Golf ball ‘Line Tool’
BEFORE GETTING STARTED
1. Using the golf nail alignment tool and golf ball, make a straight black line.
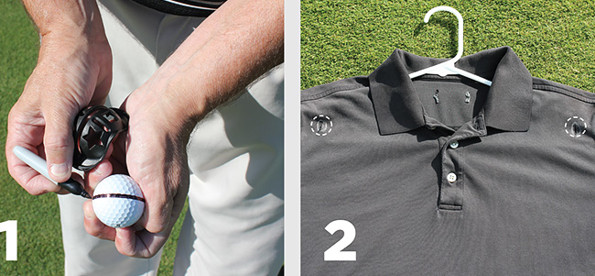 |
2. Take your shirt and chalk and mark two inches below each top seam and about an inch across from the sleeve seam. Then, make a small slit with your scissors at both marks. Now, change into your alignment shirt or, if it’s not too hot out, slip it over the shirt you are wearing.
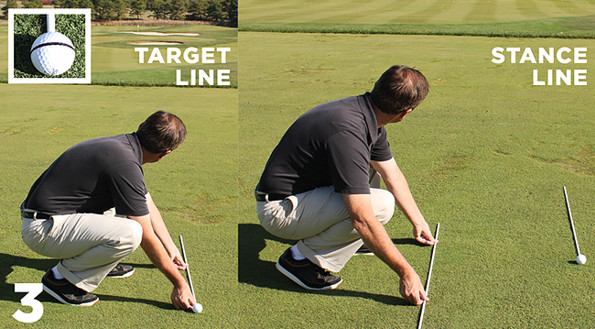 |
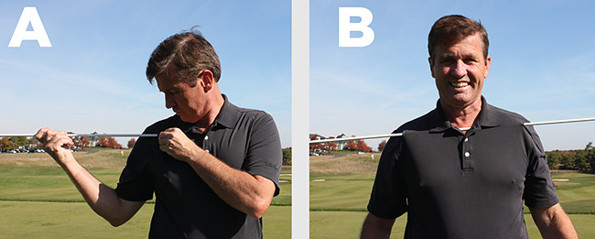
3. Then, place the first alignment rod on your target line, followed by placing the alignment ball square to the target line. Next, place the second alignment rod for your stance parallel to the target line, with the golf ball centered to it. (see photos) Finally, take the third alignment rod and fit it through the first slit and back out of the second. (A) It should now be centered across your chest. (B)
 |
THE ABCs OF AIMING
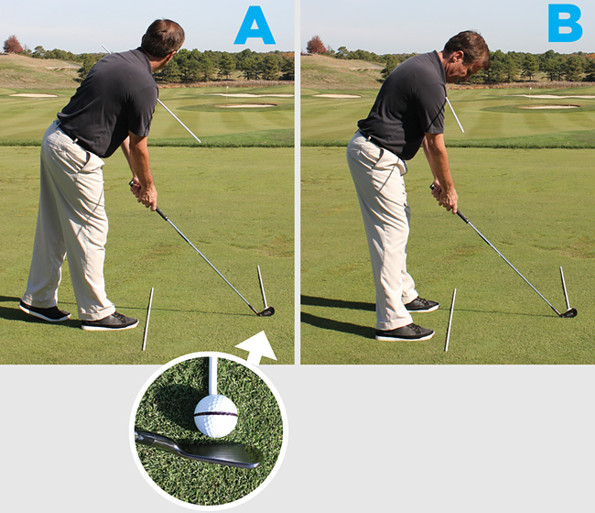 |
A — Aim clubface square to the target line and parallel to the alignment ball. KEEP YOUR LEFT FOOT BACK OF THE RIGHT IN ORDER TO FOCUS ONLY ON THE CLUBFACE.
B — Aim stance parallel/square to the target line. KEEP YOUR SHOULDERS OPEN UNTIL YOUR STANCE IS SQUARE.
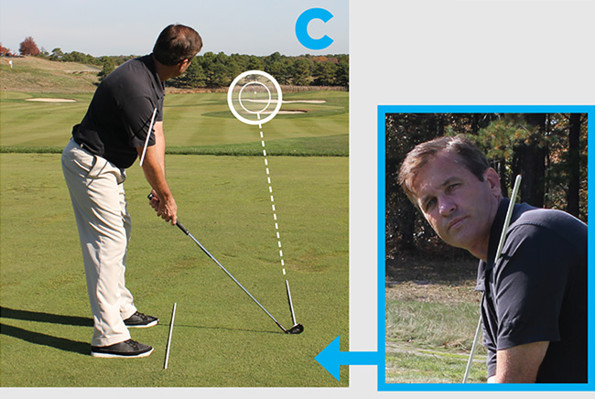
C — Aim shoulders parallel/square to the target line.
 |
THE 2-MINUTE DRILL
To become consistent with aiming and for accurate alignment, I recommend this aiming routine for two minutes on the days that you work on aiming.
HITTING BALLS
After The 2-Minute Drill, remove the shoulder aiming rod from your shirt and move the target line rod, placing it outside the golf ball and parallel to the target line.
 Now, hit balls with your new routine |
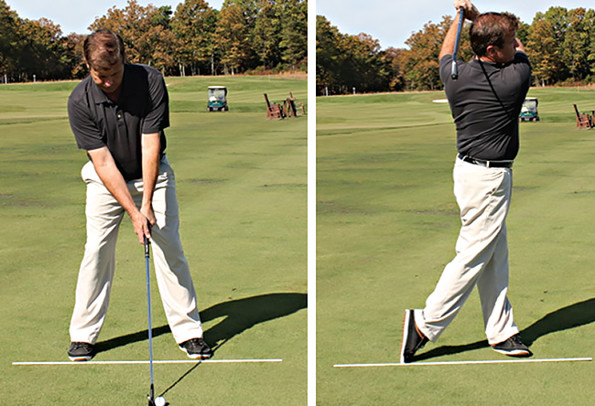
ROTATION AND SEPARATION
The Alignment Shirt System offers benefits beyond just improving your clubface, stance and shoulder alignment. It can also improve your shoulder rotation and separation, which add distance to your shots.
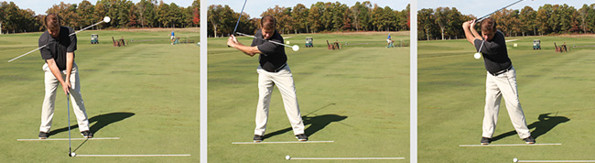 |
| Center: Poor Rotation. Right: Good Rotation |
Trigger Tip: Start your downswing with your hips to really maximize your power output.
 |
| Left: Poor Separation. Right: Good Separation |
SEPARATION
If you want to add power to your turn, torque is what you’re looking for. When you can add separation between the shoulders and hips with a wide gap, you will be adding power torque to your turn. The key is to turn your upper body against a resisting lower body.